
Formwork Stripping Sequence: Crew, Order and Man-Hours for Tie Hardware
At a glance: stripping is treated as a cleanup task and resourced like one, which is why so much purchased steel leaves a site as scrap. It is a production operation with a defined sequence, a crew configuration and a measurable output rate. The tie hardware is the constraint, not the panel. A wall can be stripped as fast as its tie points can be opened, sorted and extracted, and that rate is set by gang composition and by whether the right tools were ordered. Two numbers matter to a procurement manager: the labour minutes consumed per tie point, and the share of hardware that leaves the wall reusable.
Ordering formwork hardware means buying steel that has to survive being installed, loaded by fresh concrete, and then pulled back out again. The pour is the part that gets engineered attention. The stripping is the part where the hardware actually dies. A rod that survived lateral pressure intact can still be ruined in thirty seconds by a hammer, a pipe wrench on the thread crest, or a four-metre drop into a skip. This article covers the stripping operation itself. Stripping is the removal of formwork and its tie hardware from a wall that has reached the specified concrete strength, and it is measured per tie point rather than per square metre. The question of *when* a wall may legally be stripped, and what concrete strength is required first, is covered separately in our article on curing and striking time. The accounting side, where recovered rods are tracked as a reusable asset rather than written off, is covered in running tie rods as site assets.
Stripping refers to the removal of formwork and its tie hardware from a wall that has reached the specified concrete strength. Tie point is one location where a rod passes through the wall or anchors into it, and it is the unit the stripping labour is actually measured in. Gang composition means the configuration of workers and their roles in the stripping process, such as one worker on nuts and rod extraction and another receiving hardware into the bin.
1. Stripping is strength-gated, not schedule-gated.
The first rule of stripping is that the calendar does not authorise it. Formwork and its ties carry the full lateral pressure of fresh concrete, and the wall holds that pressure only while the concrete is green. The authority to strip comes from measured cube strength against the specification, confirmed by test results, not from a stated number of days on the programme. Site practice under OSHA's concrete construction standard requires formwork and shoring to remain in place until the concrete has gained sufficient strength, and the same principle is written into execution standards such as EN 13670.
The procurement consequence is direct: a specification that sets an ambitious striking time creates pressure to strip early, and stripping early is how ties get damaged while still under load. A rod under residual lateral load resists hand turning, invites the pipe wrench, and fails at the thread. The handling and hoisting requirements for crews working at the wall face are set out in OSHA's concrete and masonry eTool. Two practical controls follow:
- Require the strength evidence before the stripping gang is mobilised, in writing.
- Set the striking time in the specification from the actual mix design, not from a generic table.
Temperature is the variable that breaks programmes. Cold weather slows strength gain and extends the striking timetable, which is covered in our article on cold weather construction. The stripping gang waiting on strength is idle cost; the wall stripped before strength is a blowout risk plus a scrap set of rods.
2. The sequence: ties out before panels move.
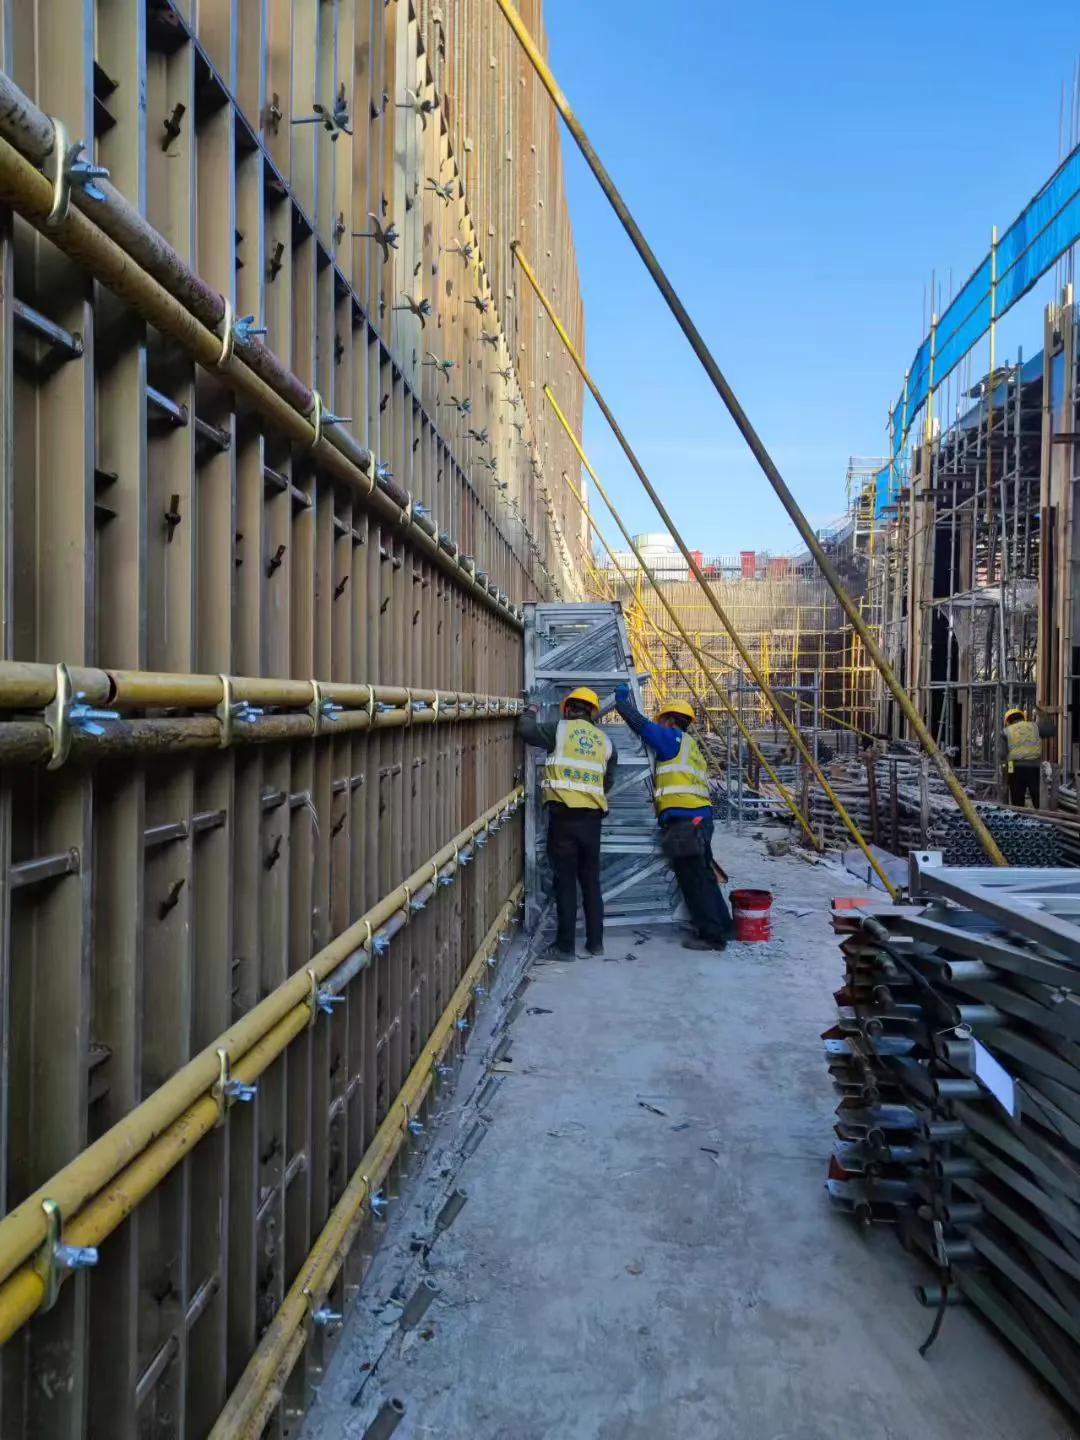
The sequence has one governing principle. Ties come out before panels move, and panels move one at a time. A wall is not stripped by removing one side of formwork with the ties still engaged. The rods then bend against the panel face and the threads gall on the way out. The correct order is top-down, panel by panel, with each tie fully extracted before the panel it belongs to is lifted.
| Step | Action | Who | Typical duration |
|---|---|---|---|
| 1 | Confirm cube strength and sign the release to strip | Engineer | Minutes, before mobilisation |
| 2 | Remove the waler props and bracing on the face being stripped | Gang | 10 to 20 min per panel |
| 3 | Break the wing nuts and washers off the rod ends, both faces | Gang | 30 to 60 s per tie point |
| 4 | Extract the rod by hand, or with a stillson on the plain shank | Gang | 1 to 2 min per rod |
| 5 | Remove the cone or sleeve from the wall face | Gang | 30 to 60 s per point |
| 6 | Land the recovered hardware into the bin, sorted by type | Gang | Concurrent with step 4 |
| 7 | Crane the panel clear and land it on dunnage | Crane operator | 3 to 6 min per panel |
| 8 | Refinish the panel face and re-oil before it goes back into the cycle | Gang | 10 to 20 min per panel |
Three sequencing errors account for most avoidable damage. The first is stripping one face with the ties still engaged, which bends rods and scores panel faces. The second is removing nuts from a whole wall before any rod is extracted, which leaves a free-standing wall with nothing but the ties holding the panels. The third is craning a panel with rods still threaded through it, which converts a recoverable set into scrap in a single movement.
Standard basis: ACI 347
3. Crew configuration and man-hours.
A stripping gang is sized by the tie points, not by the wall area. The labour content of the tie operation can be estimated bottom-up from the task times above, which is more reliable than a rate per square metre because the tie density is the variable that actually moves.
| System | Recoverable at stripping | Labour per tie point | Notes |
|---|---|---|---|
| Through-tie, reusable | Rod, two nuts, two washers | 2 to 3 min | Rod passes through and returns whole |
| Single-sided, climbing cone | Rod, cone assembly, plate, nuts | 3 to 4 min | Cone must be unscrewed, not levered |
| Five-section water-stop | Two threaded end sections | 3 to 5 min | Central core stays in the wall |
| One-piece lost-end tie | Nothing | 1 to 2 min | Rod is cut or broken off flush |
A tie point is one location where a rod passes through the wall or anchors into it, and it is the unit the stripping labour is actually measured in. On a 600 by 600 millimetre grid there are 2.78 tie points per square metre of wall, so the tie operation alone carries roughly 6 to 8 labour minutes per square metre for a through-tie system. Full wall stripping including panel handling, cleaning and refacing runs several times that figure, because the tie operation is only one part of the cycle. The planning point is that doubling the tie density doubles the stripping labour, which is why the tie grid set at the design stage is also a labour decision. Our article on sizing D15 and D20 tie rods covers how lateral pressure sets that grid.
Consider, for example, a wall 12 metres long and 3.2 metres high, which presents roughly 38 square metres of formed face and carries approximately 111 tie points on a 600 by 600 grid. At two and a half labour minutes per point, the tie operation consumes about 280 labour minutes, which is close to five hours of one worker's time. The task does not compress materially by adding people, because a single tie point can only be worked by one pair of hands at any moment. The measurement methodology behind these figures is bottom-up, not borrowed from a generic rate. Each task in the sequence is timed on the first wall stripped, the resulting totals plan the remaining walls, and the first-wall figures are retained as the contractual reference. A gang that has already stripped two walls knows its own output rate, and a procurement manager who asks for that rate before the third wall is stripped is buying information rather than guessing.
Gang composition for a typical crane-served wall:
- One worker on nuts and rod extraction, working top-down.
- One worker receiving hardware into the bin, sorted by type and diameter.
- One crane or telehandler attendant handling panel landing and slinging.
- A fourth worker covering access, bracing removal and panel refacing where the wall is tall.
Beyond four on a single wall the gang congests, because a tie point can only be worked by one person at a time. The practical way to raise output is not a bigger gang but more walls in parallel, which is a crane and access problem rather than a labour problem. Site productivity figures for formwork operations vary widely and should be established on the first wall stripped, then used for planning the rest.
Standard basis: ISO 2859-1
4. Stripping damage: how hardware is destroyed on the way down.
Nearly all avoidable loss happens between loosening the second nut and the rod reaching the bin. The failure mechanisms are mechanical and predictable, and each has a cheap preventive control.
| Error | Mechanism | Consequence | Control |
|---|---|---|---|
| Pipe wrench on the thread crest | Jaws crush the thread form | Nut will not run; rod becomes scrap | Stillson on the plain shank only |
| Hammering a seized rod | Impact deforms crest and root | Thread unserviceable; rod scrapped | Cut the rod instead of forcing it |
| Panels craned with rods engaged | Rod bends against panel face | Rod and panel face both damaged | Extract before lifting, always |
| Rods dropped from height | Impact on concrete or steel | Bent shank, bruised threads | Bin at the working level |
| Mixed hardware in one skip | Diameters and grades commingle | Wrong rod on the next wall | Sort at the point of extraction |
| Cones levered with a bar | Plastic cone cracks, steel cone scores | Cone unusable; wall face damaged | Unscrew, never lever |
A rod that has been salvaged by cutting rather than forcing is still a commercial loss, but a controlled one: the cut section goes to scrap and the remainder stays in the reusable pool. A rod forced with a wrench loses both ends and the thread, and takes the nut with it. The distinction is worth writing into the gang's instruction sheet, because the crew is making an economic decision several times an hour without realising it.
The mechanics behind that table are worth stating explicitly, because a crew that understands the mechanism applies the control without being supervised. A pipe wrench applied to the thread crest concentrates the clamping load on the crests, which are the load-bearing surfaces. The load indents them until a nut can no longer run, and the damage stays invisible until the nut is tried, by which point the rod is scrap. Hammering a seized rod transmits an impact through the crest into the root, where the material is already stressed by the rolling operation, and produces a hairline crack that propagates under the load of the next pour. Dropping a rod from height onto a panel rail or a finished floor bends the shank, and a bent shank cannot be drawn through a formwork hole without jamming, which converts a two-minute extraction into a cutting operation. Every one of those mechanisms is preventable by a tool choice rather than by care, which is precisely why the extraction tools belong in the hardware order.
Thread condition is the acceptance criterion, and the repair limits are narrow. Our article on thread damage repair limits sets out what can be re-cut and what must be scrapped, and why formwork fasteners gall explains the mechanism that makes a seized rod resist hand turning in the first place. Where a system has already produced a run of galled rods, the usual cause is the nut grade against the rod grade rather than the crew, which is a specification issue covered in choosing tie rod grade.
5. Hardware disposition: what actually comes back.
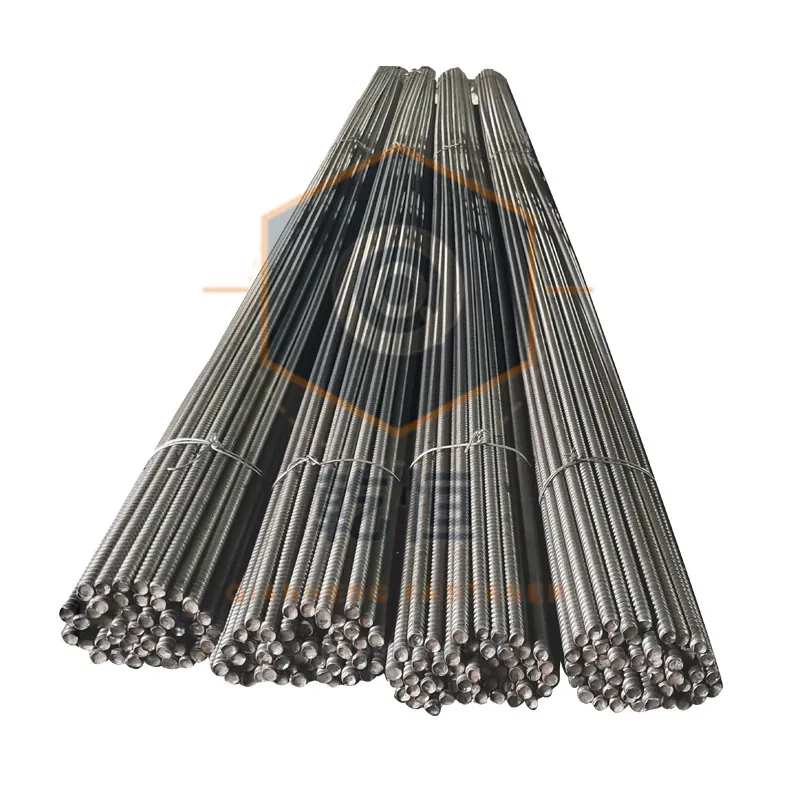
The stripping plan is also a materials plan, because the share of hardware that returns to the bin differs by system and changes the order quantity. Recovery rate is the share of purchased steel that leaves a wall in a reusable condition, and it is the number that decides whether a reusable system is genuinely cheaper than a consumable one.
Recovery rate is therefore a procurement input rather than a site statistic. Where a contract runs a five-section water-stop system across eight identical walls, order the central cores once against the total tie count and the threaded end sections against the wall count, as the ends cycle to the next wall. Getting that split wrong in either direction produces a characteristic shortage: under-order the cores and the programme stops for want of a one-way component that cannot be recovered. Under-order the ends and recovered steel arrives at the bin with nothing to screw onto. The same arithmetic governs the nuts, which are consumed faster than the rods. A damaged nut is discarded while its rod survives, and this is why accessory ratios are derived from the recovery plan, not from the installation count. A through-tie returns essentially everything. A single-piece lost-end tie returns nothing. A five-section water-stop tie sits in between, and the split determines both the order and the site storage requirement.
| System | Goes into the wall | Comes back out | Reuse implication |
|---|---|---|---|
| Through-tie, reusable | Rod passes through | Rod, nuts, washers | Highest return; needs a sorting and cleaning station |
| Climbing cone, single-sided | Cone assembly stays in the wall | Rod, plate, nuts, cone anchor | Cone is the consumable; rod returns |
| Five-section water-stop | Central core stays in the wall | Two threaded end sections | Order the ends for reuse; the core is one-way |
| One-piece lost-end | Whole rod | Nothing | Pure consumable; no recovery logistics |
For a five-section water-stop installation the threaded end sections come back after every pour and go straight onto the next wall, which is the point covered in our article on the five-section installation sequence. The central core does not return, so the order quantity for the core is set by the total number of tie points, while the end sections are ordered against the number of walls in the cycle. Cast iron water-stop nuts behave the same way: they stay in the wall and are ordered per point, as covered in cast iron water-stop nut versus welded plate.
Plastic cones introduce a decision at stripping. A plastic cone is normally broken out and discarded, because the recovery effort exceeds its value, while a steel cone is unscrewed and returned. That trade-off is quantified in plastic or steel cones: cost per use. Where the wall face must be left fair and the cone is a consumable, the stripping instruction should say so explicitly, otherwise the crew spends labour recovering a part that was priced as waste.
6. How the stripping plan changes the hardware order.
Stripping is usually discussed after the order is placed, which is the wrong way round. Four elements of the hardware order are set by the stripping operation, and all four are cheaper to decide before delivery than to improvise on site.
- Extraction tools. A stillson sized to the shank, plus a cutting set for seized rods. These are consumables in their own right and are rarely in the order.
- Sorting infrastructure. Bins or racks by diameter and grade at the working level, so recovered hardware does not go into a mixed skip. Sorting at extraction is what preserves the value of the recovered stock.
- Consumable allowance. Cones, sleeves and lost-end rods that will not return. The order needs the return share modelled, not a flat percentage uplift on everything.
- Accessory ratios. Nuts and washers are consumed faster than rods, because a damaged nut is discarded while its rod survives. The accessory order should be built on the recovery ratio covered in tie rod accessories and consumables.
The general procurement discipline behind the specification itself is covered in building a specification that survives the site, and the six failure modes that stripping either triggers or reveals are set out in why formwork fasteners fail.
Our works produces tie rods to Q235, Q345, 45# and QT450 on request, and every batch ships with EN 10204:2004 type 3.1 inspection documentation so recovered stock stays traceable to its heat. We hold approximately 300 t of stock, so replenishment for damaged sets ships within three days. More about us, our certification scope and production capacity are set out on the company page, and every procedure at our works is reviewed by a second engineer before issue. Where a stripping gang needs extraction tools, sorting racks or a replacement set sized to a wall cycle, send the wall schedule and tie layout to our engineering team. The order is then returned matched to the recovery plan, not to the installation count alone.
About us: This article covers the formwork stripping sequence, including crew, order, and man-hours for tie hardware, and is checked against Qianheng Formwork's engineering standards. Our contact page provides a way to reach our team for further inquiries, and the about page documents our company's history and capabilities. This article was reviewed by the Qianheng Formwork Engineering team.