
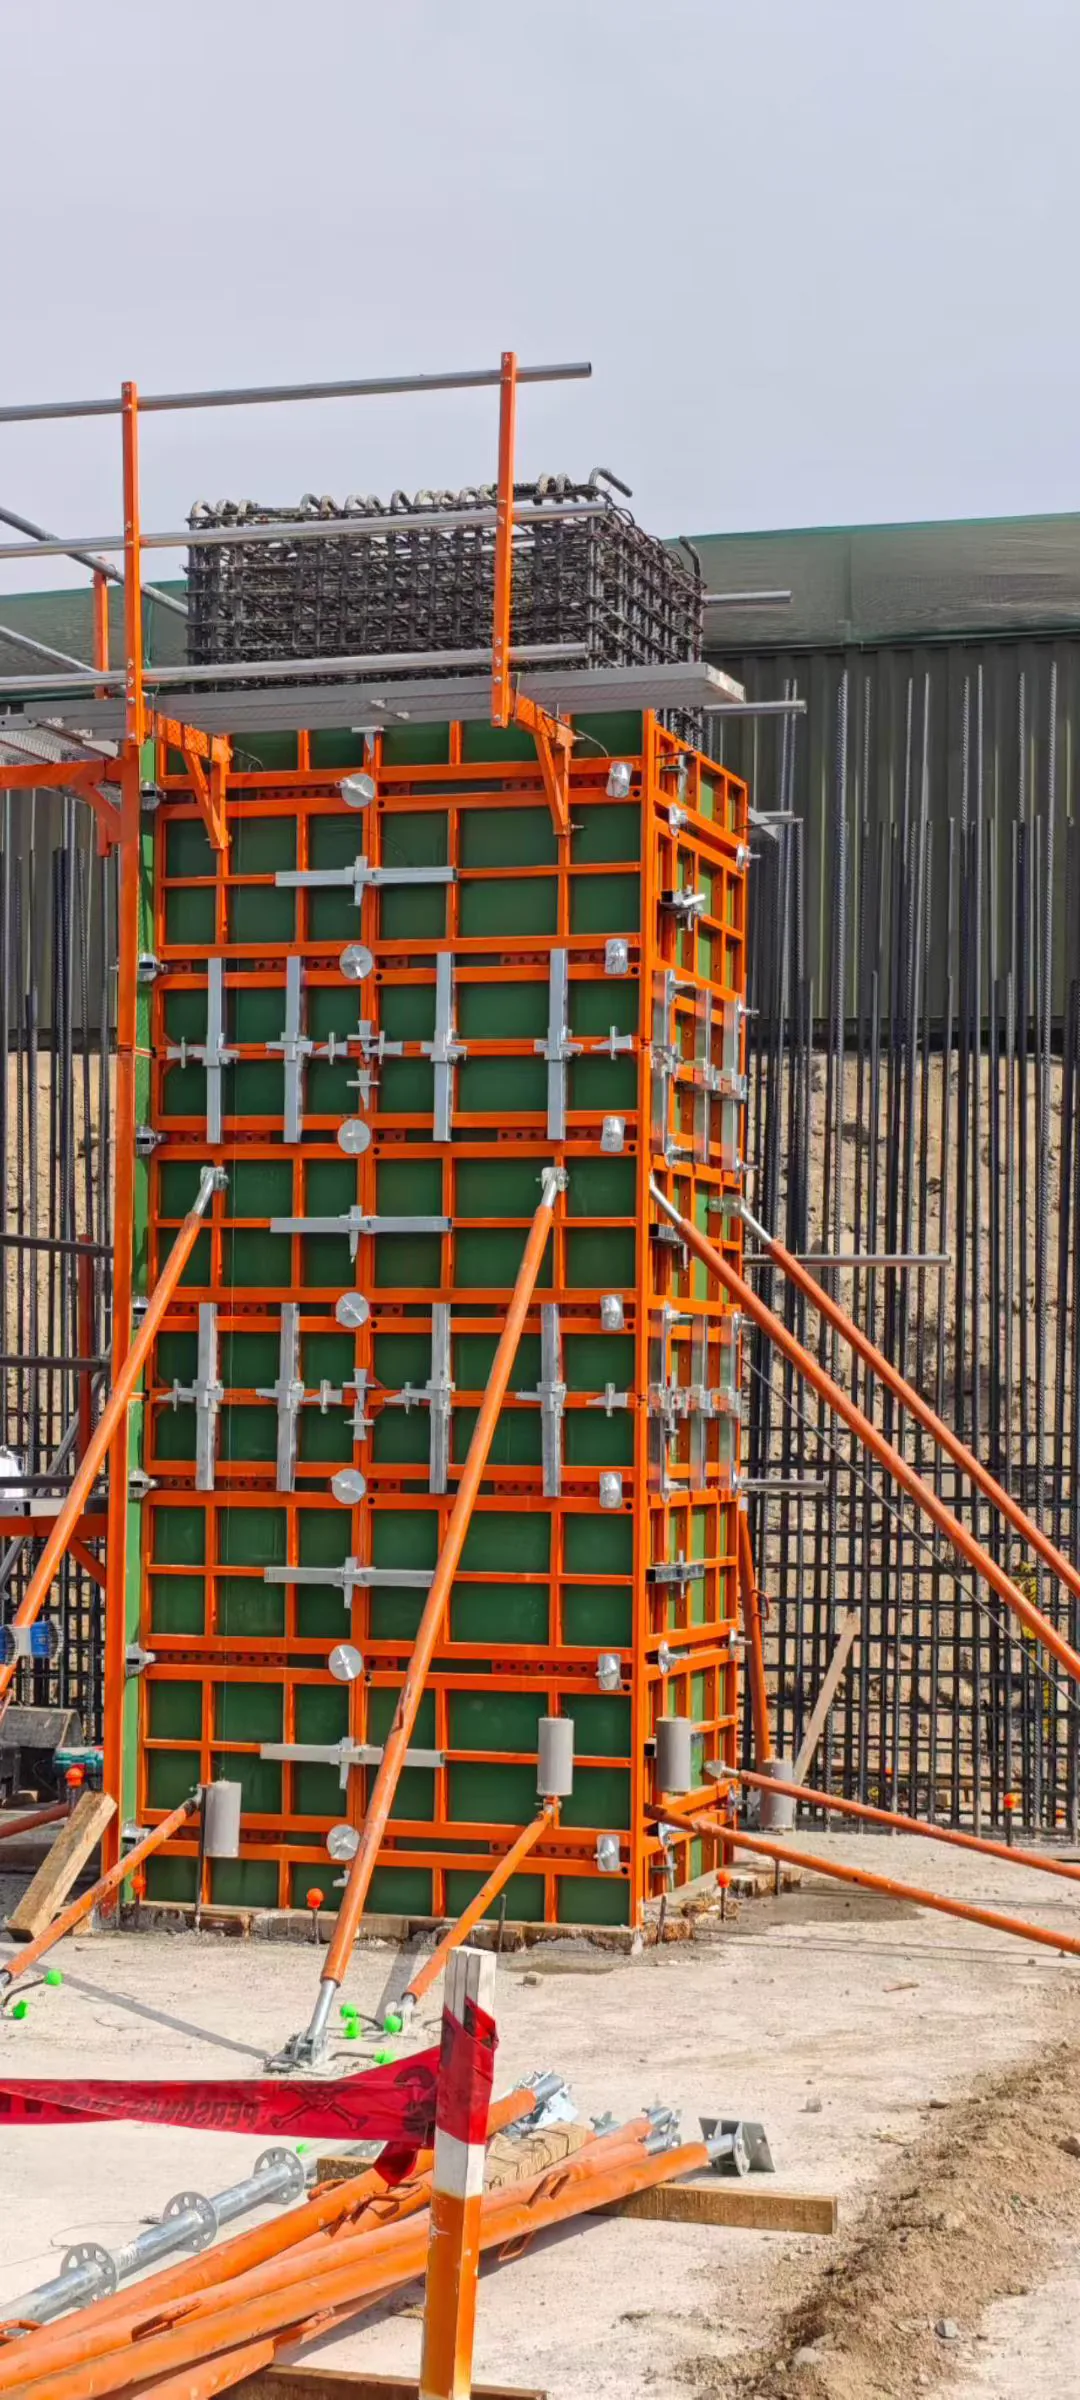
A column form has a small plan area and a pour height that is often finished in a single lift, yet on most sites it carries the highest lateral pressure of any formwork on the job. The tie layout is what decides whether the form survives the pour. It is also the part of the calculation most often reduced to a rule of thumb copied from the last project, which works until the column gets taller, the concrete gets warmer, or the pour rate gets faster.
Why columns load differently
Fresh concrete pressure depends on the pour rate, the concrete temperature, the density of the mix and the height of the lift, not on the shape of the form. A column and a wall poured at the same rate therefore see the same pressure per square metre. What differs is how that pressure is carried away.
A wall spreads the load along a long panel, so any single tie carries a small fraction of the total. A column has no such length. Every clamp or tie takes a share of a load that is concentrated into a small perimeter, and the failure mode is local: one clamp slips, the panel bows at that point, and grout loss follows within seconds.
Two ways to hold a column form
- External clamps wrap the section and need no holes in the panel. They are fast to place and fast to strip, which is why they dominate short columns and repeated cycles.
- Through ties pass through the section and bear on walers or on the panel itself. They give a direct load path and are the only practical option for large sections where a clamp would be unreasonably heavy.
- A hybrid, with clamps over most of the height and ties in the lower two metres, is common on tall columns that are otherwise clamp-formed.
- The choice is not about strength alone. A clamp that is quick to place but relies on friction against the panel face behaves differently from a tie that is bolted through it, and the site will treat them differently.
Setting clamp spacing
- Start from the pressure at the base, not from an average over the height. The base is where the first clamp has to work hardest and where the first failure appears.
- Close the spacing near the base, and open it towards the top. Uniform spacing over the full height wastes hardware at the top and is short at the bottom.
- Check the top of the lift separately. Its pressure is low, but its job is different: it holds the form closed and keeps the pour line straight.
- Treat the clamp capacity as a working load, not a breaking load. A clamp rated by its maker at a test figure has a much lower safe working value, and it is the safe value that belongs in the layout.
- Re-check the layout when the pour rate or concrete temperature changes, because both move the pressure envelope even when nothing on the form has changed.
Corners and the first clamp
The corner is where a column form most often fails first, because two panels meet at an angle and neither braces the other. The corner clamp is doing two jobs at once: holding the two panels together and resisting the outward push on each of them. If the layout treats a corner clamp as equivalent to a face clamp, the corner will be the first place to open up.
The top and bottom of the lift need the same attention as the corner for a different reason. An unsupported top edge deflects outward under very little pressure and lets grout escape, which is a cosmetic problem that becomes a structural one when the loss is large enough to disturb the cover. The first lift below the construction joint has the opposite problem: it has to line up with an already-set surface, so its clamps are working against geometry as much as against pressure.
Where through ties beat clamps
- Large sections, where a clamp sized for the pressure would be too heavy to handle and too slow to place.
- Tall single lifts, where the lower part of the form sees pressures that a friction clamp cannot be trusted to hold.
- Sections with a deep reveal or a projection, where a clamp cannot close around a clean rectangular perimeter.
- Any case where the form is to be prestressed slightly before the pour, since a clamp cannot be tightened against the panel the way a tie can.
What to put on the drawing
- The clamp or tie spacing as a dimensioned list from the base upward, not as a single figure.
- The assumed pour rate and concrete temperature that the layout was based on, so the site knows when the assumption has been broken.
- The corner detail, showing which clamp closes the corner and in which order it is tightened.
- The hardware designation and its safe working load, so the store issues the right clamp rather than a visually similar one.
- The tightening sequence, particularly for tall columns where the order of tightening affects whether the panels stay square.
A column form that is laid out this way is not more expensive to build. It uses the same hardware, placed where the pressure actually is, and it is the difference between stripping a square column and clearing up a blowout.