
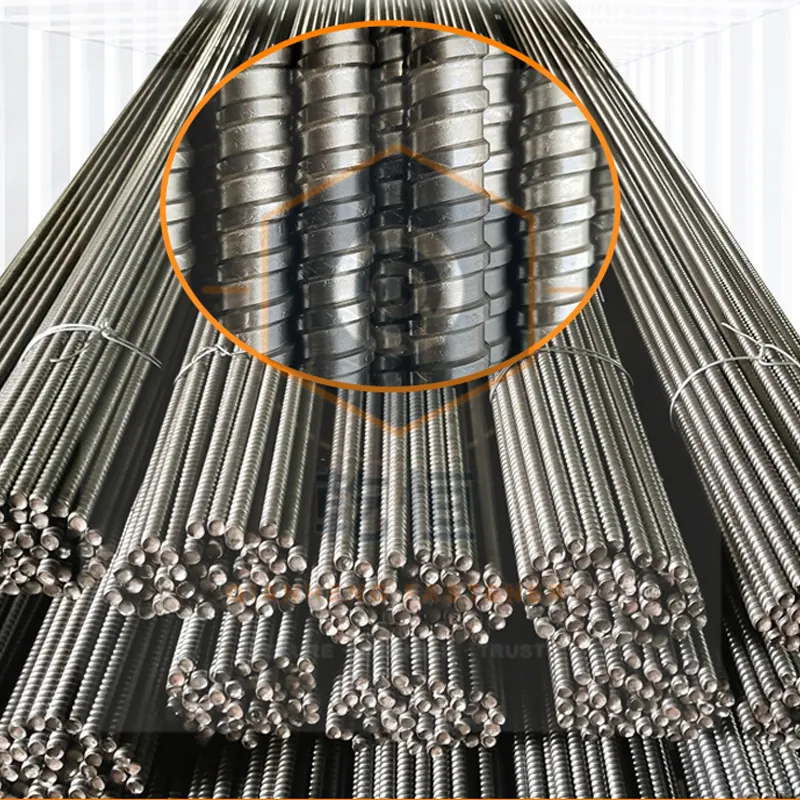
The two systems are often compared on rod price per metre, which is the wrong number. A through-tie is bought once and used many times, but leaves a hole that must be filled. A lost-end tie is bought once and buried, but leaves no through penetration. Which is cheaper depends on how many pours the fleet will cycle through and what the wall has to do afterwards.
How each one works
A through-tie (often with a PVC sleeve) passes all the way through the wall. After the concrete has gained strength the bar is unscrewed or driven out, leaving a clean hole through the section. The rod, nuts and anchor plates go back to store for the next pour. Standard D15 and D20 rods are used this way.
A lost-end tie is fixed to the formwork at each face and is either fully embedded or has only short end sections that break off inside the wall. Nothing is recovered except the nuts and plates, and in some designs not even those.
| Factor | Reusable through-tie | Lost-end tie |
|---|---|---|
| Rod recovered after each pour | Yes | No |
| Hole left through the wall | Yes — must be plugged | No |
| Consumable per tie position | Sleeve only (if used) | One bar section |
| Labour after stripping | Withdraw, clean, store | Cut back, patch recess |
| Suitable for water-retaining walls | Only with a sealing detail | Yes, with a water-stop plate |
| Needs access to both faces | Yes | No |
| Typical use | Slabs, walls with repeat pours, non-tank structures | Tanks, basements, single-sided work |
Where the money actually goes
On a project with forty identical pours, the through-tie wins on material almost every time: one bar does forty jobs. The costs that erode that advantage are the ones that never appear in the rod price:
- SLEEVES AND CONES — consumed every pour, and they must match the bar diameter.
- WITHDRAWAL LABOUR — a stuck bar costs more in crew time than the bar is worth. Bars that are not cleaned and lightly oiled before each pour seize.
- HOLE FILLING — every through hole has to be plugged, and on a tank or basement that plug is part of the waterproofing system, not a cosmetic patch.
- DAMAGE AND LOSS — bent threads, lost nuts and cut bars remove rods from the fleet; a 5% loss per cycle changes the arithmetic on long jobs.
A lost-end tie costs more per pour in steel and nothing in withdrawal labour. Its cost is predictable and linear, which is why some contractors prefer it even on work where a through-tie would technically do.
The technical constraint that usually decides it
If the wall must retain water, a plain through-tie is generally not acceptable, because the hole is a continuous path from one face to the other. Either the tie has to carry a water-stop plate — which by definition makes part of it permanent — or the hole has to be sealed with a system that is tested and specified for that exposure. In practice that pushes water-retaining structures toward five-section water stop rods or one-piece embedded bars.
If neither face is accessible — a shaft against an excavation face, a core wall against an existing structure — a through-tie is physically impossible, and the choice becomes single-sided anchorage. See single-sided embedded bolt vs through-tie.
A rough way to compare
- Count the pours the fleet will actually cycle through, not the design life of the rod.
- Price the through-tie as: rod cost ÷ realistic cycles, plus sleeve and cone cost per pour, plus withdrawal and hole-filling labour per tie.
- Price the lost-end as: bar cost per pour, plus cutting and patching labour per tie.
- Add the loss rate to the reusable side; 3-8% per cycle is a common planning figure on busy sites.
- If the wall is a water-retaining structure, stop comparing cost and follow the specification.
Which one to specify
Use a reusable through-tie when the pour repeats, both faces are accessible, the hole is acceptable or can be detailed, and there is a crew discipline for cleaning and storing bars. Use a lost-end or water-stop tie when the wall must be watertight, when access is one-sided, when the pour is a one-off, or when site logistics make recovering and storing bars unrealistic.
What to check on delivery
- Threads clean and free of damage; a bar that will not run a nut by hand is a bar that will seize in the sleeve.
- Straightness within tolerance — a bent rod is difficult to withdraw and unsafe to reuse.
- Sleeve inner diameter matched to the rod; too loose and grout leaks, too tight and the rod will not come out.
- Marking or bundling by length so the crew can issue the right rod for the wall thickness without measuring.