
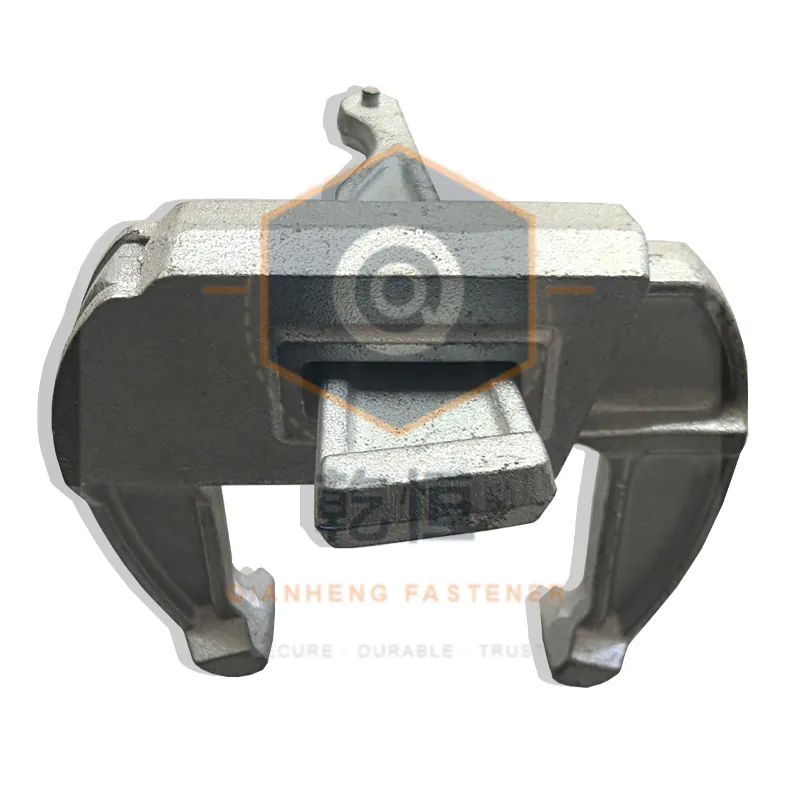
Every formwork accessory on an H20 timber beam gang form exists for a reason, but only one of them carries the pour. The H20 beam clamp is the connection between the timber beam and the steel waler — the joint through which all the fresh concrete pressure, and everything that goes wrong when it is underestimated, has to pass. Understanding what it is made of, and why it is made of two different materials, is the fastest way to buy clamps that survive the fleet cycle.
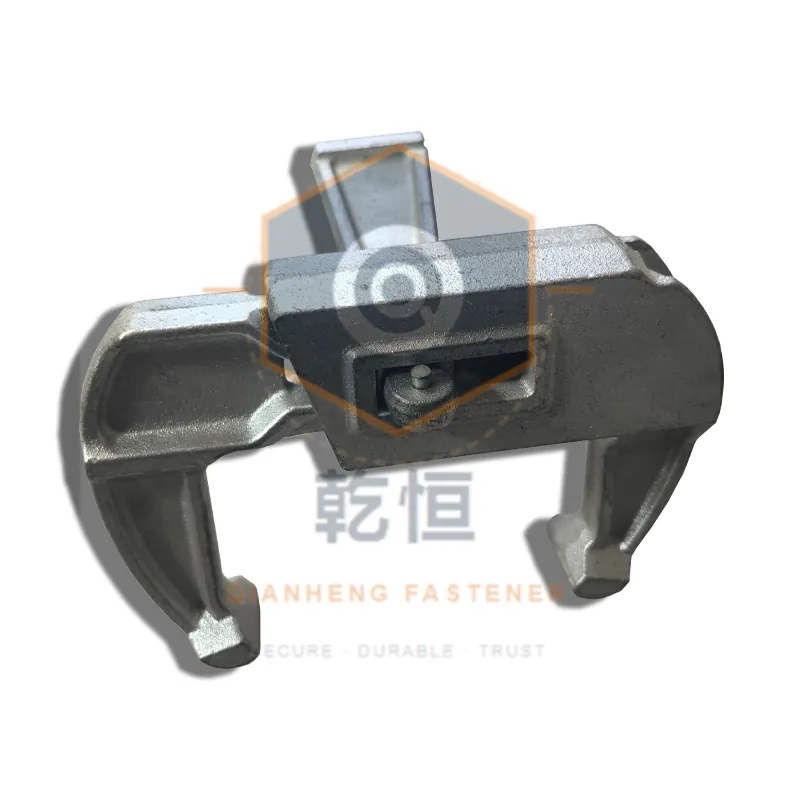
Anatomy: one clamp, two materials
A Hünnebeck-style H20 beam clamp has three working parts:
- The U-body, pressed from Q235 steel plate. It wraps under the beam flange and reaches up around the waler. Being pressed, it has spring: it flexes a fraction of a millimetre when tightened, seats fully on flanges that are not perfectly straight, and if someone seriously overloads it, it opens visibly instead of exploding.
- The left and right hooks, cast from ductile iron — QT450-10 in the common Chinese spec. Casting is the only economical way to produce a thick, curved hook with the material concentrated where the load path runs, and QT450-10 is ductile cast iron: it bends and stretches noticeably before fracture, unlike grey iron, which snaps.
- The wing nut and bolt, which pull the hooks toward each other and clamp the whole sandwich — beam flange plus waler flange — into one section.
This division of labour is deliberate. The body needs to conform; the hooks need to hold a precise grip geometry for thousands of tightenings. Pressing and casting each do one of those jobs well, so a good clamp uses both.
Cast iron versus pressed steel — the honest comparison
Buyers often arrive asking "cast or pressed, which is better?" The honest answer is that on an H20 beam clamp the question is mis-framed: the parts have different jobs. But the same question, asked properly, does matter at the product-family level.
Casting gives you density and rigidity. A cast hook holds its shape under thousands of wing-nut cycles; a cast fitting keeps tight tolerances on curved surfaces. The costs: castings are heavier, they fail suddenly if they are the brittle kind of iron, and casting quality varies with the foundry's process control — sand inclusions and shrinkage voids are invisible from the outside.
Pressing gives you ductility and traceability. Plate steel has a known grade stamped in its mill certificate, it bends before it breaks, and it is cheap at volume. The costs: a pressed part can only be as thick as the process allows, thin sections concentrate stress at bends, and an abused pressed clamp loses its grip geometry faster than a cast one.
So the practical selection rule is: hooks cast, body pressed, and the heaviest joints doubled. If a supplier offers an all-pressed clamp at a suspiciously low price, the hooks are where they saved — check them first. If a supplier offers all-cast clamps, expect heavier shipments and sudden failures on rough sites.
What the clamp has to hold
An H20 beam itself is rated around 5 kN/m in bending and 11 kN in shear under the common European beam standards. The clamp connection must transfer that beam's tributary load into the waler without slipping. Reputable clamp specifications land in the 500 to 1,000 kg working load range depending on configuration, and our heavy-duty configuration is rated to approximately 1,000 kg. Two things follow:
- The pressure envelope matters. Fresh concrete pressure is highest at the bottom of the pour. The lowest waler line carries the most; clamps there deserve the heavy-duty rating, and doubling up is cheap insurance.
- Slip, not breakage, is the usual failure. A clamp that is under-tightened or rocking on a mismatched flange lets the beam creep out of line during the pour. The symptom is a bowed panel face, not a snapped clamp — which is why installation discipline matters as much as the rating.
Installation discipline
- Mount the clamps with the wing nuts facing downward so concrete spoils do not pack into the threads.
- Push the clamp fully onto the beam before tightening; a clamp seated on the flange edge has a fraction of the grip area.
- Snug one side, tap the body with a hammer to seat it square, then tighten both sides fully.
- Re-tighten after the first lift on tall pours — timber compresses slightly under load and the clamp can relax.
What to check before ordering
- Hook material by name. Specify QT450-10 (or an equivalent ductile iron grade) in the purchase order. "Cast iron" alone covers grey iron, which fails without warning.
- Body thickness and grade. Ask for the Q235 plate thickness; sub-3 mm bodies are where cheap clamps save their money.
- Grip range. Confirm the clamp's adjustable range covers your beam and waler flange combination — adjustable grip is the point of the design.
- Zinc finish. Electro-zinc for standard cycles, hot-dip for outdoor or coastal storage.
- Spare hooks. Hooks wear with repeated wing-nut cycling; they are the replaceable wear part. Order them separately so a worn hook does not scrap an otherwise good clamp.
One joint, one fitting
Do not use beam clamps to fix the beam to the panel — that is the timber beam claw connector's job, and it is faster there. The clamp earns its keep where the load passes into the waler. Matching the fitting to the joint is what keeps both cheap and safe.